Bridges

bridges

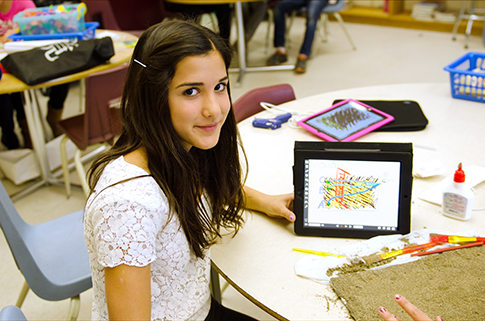
Type and Purpose of Learning

In this lesson, students engage in creative learning, problem-solving and using observation and imagination to find out what materials can do and make compositional decisions to produce a bridge. They draw, stack and manipulate materials, using thought and pre-planning to design and build a bridge.

According to The National Institute of Play (2009), a transformation takes place when play is mixed with science. They call it Transformative-Integrative and Creative Play. Through this process, new understandings emerge as students take real life situations and mirror them through play. In other words, students learn fundamental concepts such as force applied to structures, mechanical advantage of gears and the strongest bridge design while replicating a famous bridge from their research.

As a culminating science activity, the grade five students were excited to learn about designing and then constructing their own bridges that could withstand a weight of 500 grames or more! In fact, the class couldn’t contain their enthusiasm and immediately began chatting about familiar bridges and what materials they would use in their construction. Before any construction took place however, students were given background knowledge of gears, pulleys, types of forces and various bridge designs around the world. The research alone was a fascinating activity in itself but to then replicate a famous bridge through a blueprint and model, was, as one student put it, “the best activity I’ve done this year!”

While being mock architects, engineers and construction workers, students had the opportunity to feel what it was like to organize, create and solve problems in the real world. In doing so, the science concepts of gears, pulleys, types of forces and various bridge designs became more meaningful and realistic to the students through what is known as construction play.

Researching famous bridges took students on a journey around the world via the internet and at times to familiar places. “I liked researching about famous bridges because I found the Tampico Bridge which is right next to my cousin’s house in Mexico.” By making a personal connection to the research, students are more likely to transfer their learning into their long-term memory.

The actual construction of the bridges prompted even greater enthusiasm. One student commented. Students couldn’t wait to bring in their completed bridges, along with their research, and then test the bridges’ strengths using 10 grams – one kilogram weights. Some designs were so strong that it took a student standing on them to finally make them collapse! Other students couldn’t face the idea of breaking their bridges and chose to preserve them by testing their strength with the minimum 500 gram requirement. All in all, the excitement of testing the strength of the student-made bridges was a highlight of the project.

During the process, we stumbled over a few challenges. These included bridge constructions that did not withstand the test of time and broke before being tested with weights, constructions that were unable to stand on their own, the use of materials that were not strong enough to hold the required weight and bridges that were not as aesthetically-pleasing as the students had hoped.

Science fits in beautifully with a play-based environment. The level of engagement was evident from the moment students began designing their bridges through to building them and testing the strength of their creations. When asked about their favourite part of the bridge building project, everyone agreed that the element of suspense and excitement while testing the bridges, turned this activity into an extraordinary extravaganza.

Lesson Focus

Students will investigate and identify forces that act on structures as they build bridges.

Lesson Plan

Assessment/Reflections for Future Lessons

While observing the students in the activity, I looked for the following:

  1. Do students communicate using scientific terminology such as tension, compression, mechanical advantage, drive gear, gear train, fixed pulley, moveable pulley, block and tackle pulley system?
  2. How well do the students understand the concept of the strongest shape and the advantages of pulleys and gears?
  3. In what ways do the students show a connection between weight and strength of material used?
  4. How effective are the students’ research skills – jot notes, separating truth from fiction with facts and writing researched material in their own words?

Curriculum Expectations

  • Analyze social and environmental impacts of forces acting on structures and mechanisms.
  • Investigate forces that act on structures and mechanisms.
  • Identify forces that act on and within structures and mechanisms and describe the effects of these forces on structures and mechanisms.
  • Use scientific inquiry/research skills to investigate how structures are built to withstand forces.
  • Use technological problem-solving skills to design, build and test a frame structure (e.g. a bridge, a tower) that will withstand the application of an external force or a mechanical system that perform.

Introduction (MINDS ON)

Explain to students that we are going to hold a competition to see who can build the strongest and most aesthetically-pleasing bridge which can hold a minimum of 500 grams of weight.

Materials:

  • popsicle sticks
  • doweling
  • bamboo sticks
  • barbeque skewers
  • paint
  • string or wire
  • glue
  • tape
  • camera
  • extra material: pop cans/water bottles

By reviewing the anchor charts created for each of the learning goals listed above, students will be better prepared to begin this activity.

Student Tasks (WORKING ON IT)

Bridge Design:

  • In pairs, students will research famous bridges from around the world which represent the various bridge designs of truss, suspension, arch and beam.
  • Individually, students will design a replica of one of the famous bridges researched with the intent of building it using the materials listed above. It is important to keep in mind the creation of a rigid, strong shape that can withstand the compression of 500 grams. The picture needs to be labelled properly with accurate measurements and descriptive detail of material used.

Bridge Construction:

  • Using the materials outlined on their design, students will construct their bridges, keeping in mind shape and aesthetic appeal.
  • At this time, students are recommended to test the strength of their bridge to ensure they can hold a compression of 500 grams of weight. If their bridges do not hold this weight, students have an opportunity to alter their design to ensure greater strength.

Once the bridge is complete, students will have the option to add colour and other detail to give their bridge a realistic appeal.

Share and Connect

As an extension to this activity, students may ponder the following questions:

  • What modifications would you make so your bridge can withstand an earthquake/hurricane/snow/wind storm?
  • If you were to change one aspect of your bridge such as its height or width, what other modifications would you need to make?
  • How can you apply the learning from your bridge-making project to create a famous tower, a Roman aqueduct, a lookout over Niagara Falls or the Grand Canyon, or even a bungee jump platform at Canada’s Wonderland that can withstand the weight or pull of at least 500 grams?

Accommodations/Modifications

Meeting the learning needs of all students is vital in an effective lesson. By providing a visual and concrete example of a strong aesthetically-pleasing bridge, educators are better able to guide students when it comes to their design, materials needed and construction of bridges. Pictures of famous truss, beam, arch and suspension bridges displayed on a bulletin board are also helpful to students who need an extra reminder of bridge types found around the world. Lego has created gear and pulley kits which give the hands-on learner an opportunity to build a merry-go-round, windmill or crane. In the process, students better understand mechanical advantage and easier ways to move a heavy load such as a drawbridge.

Students can test the strongest shape by comparing the number of text books held up by a cylinder and a rectangular prism (both are made out of construction paper and tape), to understand that the cylinder is a stronger shape to use in their bridge construction.

Students also share their bridge designs with one another to ensure all aspects of the assignment are included before any construction begins. In doing so, students avoid any potential weaknesses in their bridge such as the use of materials that wouldn’t be strong enough or a design that would be unstable. This also gives the teacher an opportunity to fine-tune and assist any students who might find the bridge design section challenging.

Differentiation

Impact Quotes (Impact Analysis)

“It was fun going around and collecting all the materials I needed to build my bridge. When I was building it, I felt like a construction worker.”

“I liked using the glue gun. I’d never used one before and it was a cool experience.”

“Building my bridge made me feel like a grown-up!”

“The best activity I’ve done this year!”

ETFO (2012). Play in the Junior/Intermediate Classroom.
Ontario Ministry of Education (2007). The Ontario Curriculum Science and Technology Grades 1 to 8 Retrieved from
http://www.edu.gov.on.ca/eng/curriculum/elementary/scientec18currb.pdf
The National Institute for Play (2009). Play Science – the Pattern of Play. Retrieved from
http://www.nifplay.org/states_play.html

Bridges: Research

Grade:
Curriculum:

Leave a Reply